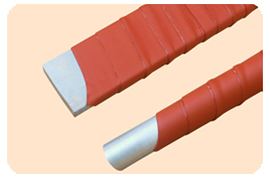
Heat shrink tubing has become synonymous with insulation. Heat shrink tubes and heat shrink tape works in a number of ways on your electric cables. Most importantly, it insulates the cables and protects people from a hazardous contact with it. Besides, it also protects your cables from the inclement weather, chemicals or abrasion and does a good job of colour-coding and bundling them. The following guide gives an idea of the insulation process.
Safety-First Priority
Firstly, ensure that you have the required materials like the heat gun and obviously the shrinking tape or tube ready in hand. Next, ensure that the necessary safety precautions are in place like having goggles for eye protection, respirator to prevent chances of fume inhalation, good cotton clothing, sufficient ventilation in the work area and removal of any flammable debris in the work area.
Choosing the Diameter
Choosing the correct diameter size of the heat shrink tube is important. In this context, a mention has to be made of two terms regarding the diameter and they are; the recovered diameter and expanded diameter. Expanded diameter is the pre-shrinkage diameter which should be sufficiently large so as to conveniently fit the area that has to be insulated including the connectors too. Recovered diameter is the post shrinkage diameter and should be lesser than the diameter of the area that has to be insulated as only then can it provide a snug fit.
Cutting it Right
Cutting the shrinking tube to the required length is the next step. While doing so, a margin of at least ¼” has to be kept lengthwise as the tube shrinks about 5%-7% lengthwise. Cutting can be done quite easily with standard scissors.
Sliding Smoothly
With all the items cut and ready, you need to slide the tubing over the cables or the object that you want to be covered. If you want to cover splicing of two cables, then the tubing has to be slipped on to cover the splice’s centre and some area equally on both the sides.
Heating Temperature
Before proceeding further, first check the heating temperature recommended for the specific tubing. A heat circulating oven or a commercial heat gun both serves this purpose. Use of gas stove top is not recommended for providing the heat as the uncontrolled heat can cause physical damage, uneven shrinkage or even lead to failure of insulation.
Shrinking
If the cable that has to be covered with tubing is pretty long then you need to start the shrinking process from one end and slowly move on towards the other end. While applying heat it is essential to rotate the object in question so that no air bubbles are formed while shrinking. Even application of the heat is necessary to achieve uniform shrinking of the tubing. Once the tubing closes tight over the object in question move the heat source away and let the tubing cool on its own before applying any physical stress to it. Over-heating has to be avoided at any cost as otherwise; you will have nothing but brittle and charred heat shrink tubing in your hand.
Summarizing
Insulating cables on your own is not a hard task. Follow the above mentioned steps and you will have great results with your heat shrink tubes and heat shrink tape.