Pole Cap
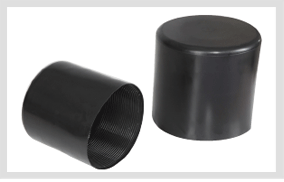
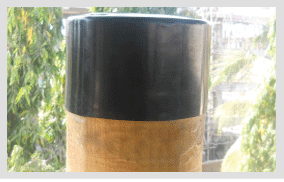
Pole Cap is Heat Shrink Cap, used to cover the top of the Wooden Power Pole & to protect it from ingress of water / moisture, thereby increasing Pole life. The caps are manufactured from high quality Cross-linked Polyolefin material.
The Best & Cost-effective Solution for long term maintenance of Poles :
- Wood shrinks when losing moisture from the cell walls & swells when gaining moisture in the cell walls. This shrinking & swelling can result in warping, splitting, cracking mainly from top surface; which can cause gaps & loosening of Tool Handles. Wooden Poles with Pole Cap eliminates such problems & avoids extra cost of Clamps, used to tighten the gaps; thereby avoiding long term maintenance of wooden poles.
- Use of Polecap typically adds some nominal percentage to the total cost of New Pole replacement. Precaution is always better than cure.
Features:
- Hot melt adhesive lining provides 100% environmental sealing against weathering, moisture, contamination and adverse environmental conditions according to IP 68.
- Resistance to UV rays & Ozone.
- Versatile and cost effective, as 5 sizes of Pole Cap covers Pole dia. from 140 mm to 460 mm.
- Service life of Pole Cap is more than 30 years.
- Easy installation on concrete, wood, steel or composite poles in minutes.
Benefits :
- Once the heat applied, adhesive filled inside the top surface (optional) melts & penetrates into the pole cracks and cavities, thereby reinforces the top of the pole.
- Provides excellent Impact resistance, i.e. when a Pole end covered with Pole cap hits on a sharp edge, it would not crack.
- Prevents birds from perching (woodpecker damage) or nesting on top of round tubular & solid poles. Protects the top of the pole from damage caused by freeze and thaw conditions.
- Eliminates outages from flash-over & electrocutions.
- No maintenance after installation.
Technical Qualification Report : QR 1035
SELECTION CHART
All dimensions are in mm
- CODE NO.
- Ds (Min.)
- Df (Max.)
- LS (Min.)
- Tf(± 10%)
- POLE RANGE
- GPC 8015
- 190
- 125
- 220
- 4.0
- 140 - 165
- GPC 801
- 230
- 125
- 220
- 4.0
- 140 - 200
- GPC 901
- 310
- 120
- 220
- 7.0
- 140 - 280
- GPC 1001
- 400
- 204
- 220
- 6.0
- 230 - 360
- GPC 1101
- 500
- 200
- 220
- 6.0
- 230 - 460
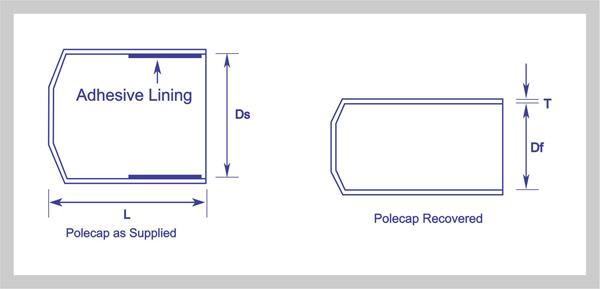
D : Internal Diameter ; s : as supplied ; f : after free recovery
TECHNICAL SPECIFICATION
- PROPERTIES
- VALUE
- STANDARD
- Tensile Strength
- 12 N/mm2 (Mpa) (min.)
- ASTM D638
- Ultimate Elongation
- 350% (Min.)
- ASTM D638
- Water absorption
- 0.2 % (max.)
- ASTM D570
- Accelerated Ageing
- (120oC for 500 Hrs)
- ASTM D2671
- Tensile Strength
- 11 N/mm2 (Mpa) (min.)
- ASTM D 638
- Ultimate Elongation
- 300%(Min.)
- ASTM D638
- Heat Shock (250oC for 30 Min.)
- No Cracking or flowing
- ESI 09-11
- Continuous Temperature limit
- -40oC to + 110oC
- IEC 216
- Dielectric Strength
- 12 KV/mm. (Min.)
- ASTM D149
- Volume Resistivity
- 1 x 10¹⁴ Ohm.cm(min.)
- ASTM D257
- Dielectric Constant
- 5 (Max.)
- ASTM D150
INSTALLATION INSTRUCTIONS
Polecap supplied by us are in an expanded form. When heated above 1250c they attempt to shrink back to their original dimensions, conforming to the objects they cover. Use a propane (preferred) or butane gas torch. Adjust the torch to obtain a soft blue flame with a yellow tip. Pencil-like blue flames should be avoided. Keep the flame moving continuously to avoid scorching the material.
-
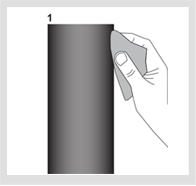
Pole Preparation :
If necessary, cut the Pole end so that it is straight and even. Clean and de-grease the Pole surface that will come into contact with sealant. (Fig. 1)
-
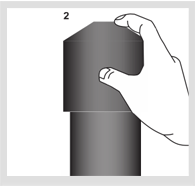
Installation of Polecap :
Place the Polecap over the top of the Pole.(Fig. 2)
-
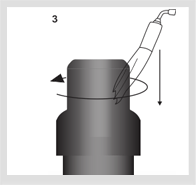
Shrink the Polecap into place, starting at the closed end and working towards the Pole Adhesive will be visible at ends. (Fig. 3)
-
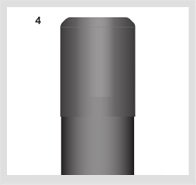
Properly installed Polecap will be smooth and conform to Pole. Allow the cap to cool before applying any mechanical strain. Installation of Pole cap completed. (Fig. 4)
Products
Heat Shrinkable Moulded Shapes
Heat Shrink Tubes / Heat Shrink Sleeves
- Advantages Of Heat shrink Tubing
- Thin Wall Tubes
- GDW : Dual Wall Tubing
- Medium/Heavy Wall Tubes-Commercial
- Heat Shrink Co-extruded Tubing Premium Quality
- Red Insulation Tubes
- Non Tracking Tubes
- Busbar Sleeves
- Stress Control Tube
- Integrated Stress Control Tube-GVOT Tube
- Heat Shrink Double Layer Tube-GDTL Tube
- High Shrink Ratio Heat Shrink Tube
Switchgear Insulation Products
- Barrier Board Sheet
- End Sealing Kit for Extensible RMU/GIS Bushing
- Heat Shrink Bus Bar Sleeve
- Bus Bar Insulating Shrouds
- Bus Bar Insulating Shrouds Polyolefin
- Bus Bar End Caps
- Thin wall tube wire marking
- Heat Shrink Tape (Bustape)
- Insulation for Circuit Breakers
- Busbar Sleeve for 66 kV
- Bushing Boot
- Non Shrinkable High Voltage Tape
- Heat Shrinkable Gland


